

denacopoliez
-
Posts
52 -
Joined
-
Last visited
Content Type
Profiles
Forums
Events
Gallery
Everything posted by denacopoliez
-
From The Frame, Up!
denacopoliez replied to denacopoliez's topic in Cases, Power Supplies and Modding
The 92mm fan is on back order with TigerDirect, and though an unforseen byproduct the effect will remain in place, the owner loves it. So i think that the sleeper is a sucess but with some added benifits! -
From The Frame, Up!
denacopoliez replied to denacopoliez's topic in Cases, Power Supplies and Modding
Ok so the sleeper is done until the 92mm fan comes in for the rear of the case. This is the case up and running, very smooth this machine is crapin' fast, the last thing that it touched that was this fast was my boys BMW M3. Here is a Picture of the case and wire management. I think it -
Geekiest Pickup Lines You Can Think Of?
denacopoliez replied to Kamikaze_Badger's topic in OCC Member's Lounge
Haa haa haa the word dongle is the best i dont have any lines, but i have to tell you that was some seriously funny stuff.... haa haa haa haa dongle! -
From The Frame, Up!
denacopoliez replied to denacopoliez's topic in Cases, Power Supplies and Modding
so by the time I remembered that I was posting the work that I was doing it was to late to put the crappy MSI n1996 P4 MoBo back in and take pictures so what you folks are getting is the abbreviated version of all of my work last night!! So in the case was a maxtor 80gB HDD, 52x CDROM, 32x CDR, the crappy MSI MoBo with the equally crappy iNTEL 2.24Ghz chip (not sure on the specifics), 300w PSU, 256Mb RAM, and a sweet Xtasy 9600XT / 128MB DDR / PCI card. Sweet for the fact that it is the best piece of hardware in the case and I don -
I just thought that it would be a great opportunity to announce another forum is about to start over the next few days I am going to a sleeper rig from 0 to hero and all the info will be here! This is going to be the cranked up sleeper with some amazing equipment but the beauty of it is
-
Monitor Painting Success
denacopoliez replied to BrewMeister2010's topic in Cases, Power Supplies and Modding
:thumbs-up: Nice work Dude thanks for Referencing my forum in it apprecitate the ack! Looks good! -
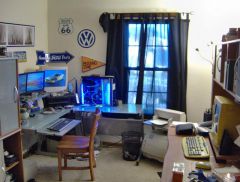
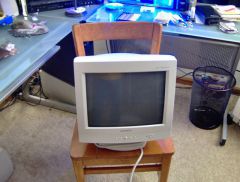
Ok Kids, Here it is the Final Picts, got home from Duty this Morning and put it all together, The buttons gave me a hard time to much paint on them and around the holes but Exacto fixed that. As you can see the color is a bit off but it's cool she likes It! "How many other People have A Monitor Like This!" Our Cozy Office!
-

From the album: Monitor
-
From the album: Monitor
-
From The Beginning!
denacopoliez replied to denacopoliez's topic in Cases, Power Supplies and Modding
~Primary System Dell OptiPlex GL260 1.6Ghz P4 1GB RAM 40GB Western Digital Cavar 250GB Western Digital Cavar Sony DVD+RW 16X Dual Layer LiteOn 52X CD-RW AGP Matrox Millennium G450 - - - - - - Dual VGA Out PCI Trident CyberBlade-XP - - - - - - Single VGA Out External USB 40GB Western Digital Cavar 20GB iPOD HP iPAQ 2760 Ok Kids, Here it is the Final Picts, got home from Duty this Morning and put it all together, The buttons gave me a hard time to much paint on them and around the holes but Exacto fixed that. As you can see the color is a bit off but it's cool she likes It! "How many other People have A Monitor Like This!" Our Cozy Office! -
From The Beginning!
denacopoliez replied to denacopoliez's topic in Cases, Power Supplies and Modding
The monitors are at the perfect hight for me right at eye level. But i also have an old wooden school teachers chair instaid of an office chair... -
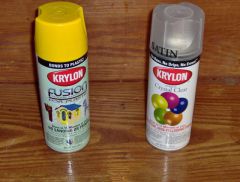
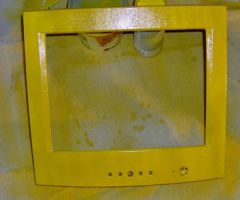
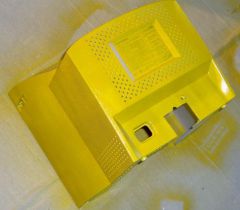
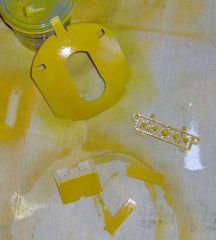
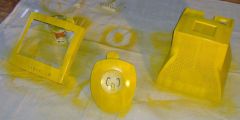
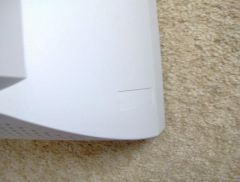
Ok, So here we are a few hours later and i have good news and bad news. Its fun, I am high, and i ran out of paint... arg, had to go back to the store. I got more paint and i started to finish the first few coats, to my interest the Fusion has a bit of texture with this color Sunbeam. Notice the texture below. So thats great I guess the Satin clear coat seems to reduce that a bit but my wife isn't going to lan with that PC so I guess that I am ok! The "DEAWOO" and the "Low Radiation" worried me at first they seemed not to get cover up. but after about 10 layers it was all good as you can see below. The main cover came out nicely too. The small pieces came out the best, as you can tell by the buttons and snap in panels. The base lookes the best. See how glossy the satin made it. Well there they all are. I left them to dry, hopefully by tommorw they should be dry enough to assemble. A few tips, - Take your time. - Spray from about a ruler length away. - Lots of coats looks better than one thick Coat!!!! - Have Fun!
-
From the album: Monitor
-

From the album: Monitor
-
From the album: Monitor
-
From the album: Monitor
-
From the album: Monitor
-

From the album: Monitor
-
From the album: Monitor
-
From The Beginning!
denacopoliez replied to denacopoliez's topic in Cases, Power Supplies and Modding
The Desk at Staples is not the quality as the one that i got, thats one actually isnt tempered glass on the top and will break if you are not careful. for 50$ more why not go all the way? The store that i got this one is Eurway and the link there will take you to the desk.. I have stood on this desk I doubt that you could do that with the one at staples. So here it is Saturday and the painting will comence shortly, More to follow. Ok, So here we are a few hours later and i have good news and bad news. Its fun, I am high, and i ran out of paint... arg, had to go back to the store. I got more paint and i started to finish the first few coats, to my interest the Fusion has a bit of texture with this color Sunbeam. Notice the texture below. So thats great I guess the Satin clear coat seems to reduce that a bit but my wife isn't going to lan with that PC so I guess that I am ok! The "DEAWOO" and the "Low Radiation" worried me at first they seemed not to get cover up. but after about 10 layers it was all good as you can see below. The main cover came out nicely too. The small pieces came out the best, as you can tell by the buttons and snap in panels. The base lookes the best. See how glossy the satin made it. Well there they all are. I left them to dry, hopefully by tommorw they should be dry enough to assemble. A few tips, - Take your time. - Spray from about a ruler length away. - Lots of coats looks better than one thick Coat!!!! - Have Fun! -
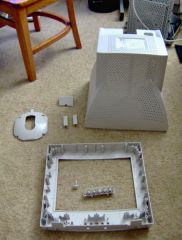
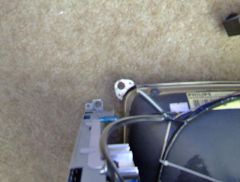
This monitor (see above)that I am going to be working on has never been used infact I just pulled it out of its wrapper. As you can see its your standard (arg) beige. (why in God's name that was such a popular color?) So I am going to remove the panels. First I place the monitor face down on its screen and remove the 5 screws that hold the back cover on to the front and the frame. Ocne the cover is off you will find 4 more screws holding the tube to the front cover and 2 for the "mainboard." Remove these and carefully take the tude and the main board elseware, my wife helped me with this as they are not easy to move together. Once that is done you will have all of the parts of plastic to be painted. ... Please note that i have removed all of the buttons and the led so that i can paint them seperatly and not fuse them with the case.... More to follow tommorow...
-
From the album: Monitor
-
From the album: Monitor
-
From the album: Monitor
-
From the album: Monitor