Hi, everybody!
Today I want to share a simple Serial Programmer design for AVR. Any interests? Then take a time for reading~
This is a very simple and easy to build programmer for Atmel microcontrollers from AVR family. The microcontrollers must support serial programming. This programmer is connected to a PC through the RS232 serial interface and can be used with the PonyProg or Avrdude software programmer.
Description of the serial programmer:
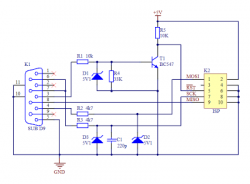
The programmer is quite simple and it is based on the SI-Prog from the author of PonyProg software. The Zener diodes D2, D3 with the resistors R2, R3 reduce the voltage from the ouput pins DTR, RTS on the serial port to around 5V which is suitable for microcontroller (MOSI, SCK). MISO signal is connected directly to the input CTS pin. The Zener diode D1 with the resistor R1 drive the NPN transistor T1, which controls RESET signal. The AVR microcontrollers are in reset when the signal has low level. The resistor R5 works as a pull-up for reset signal. The resistor R4 helps to close the transistor T1. The programmer has standard 10 pins header.
(Schematic of the serial programmer)
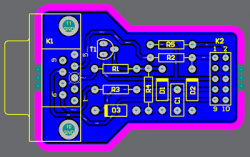
(Assembly diagram)
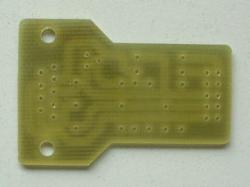
(PCB (top side)?
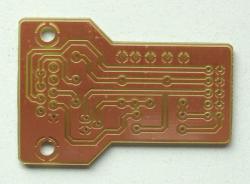
?PCB (bottom side)?
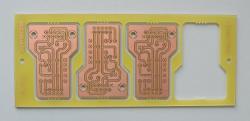
(Panelization (When you need more pieces.))
Attention:
The transistor T1 should be in opposite position then is depicted in the assembly diagram.
Please check the position of Base-Colector-Emitor on your transistor.
I use this programmer for programming Attiny13, Attiny26, Attiny2313, Atmega48, Atmega88, Atmega168, Atmega16 and it works very well. I also use the programmer with desktop computer, laptop, with and wihout USB-to-RS232 adapter and it works in all cases.
Using PonnyProg2000:
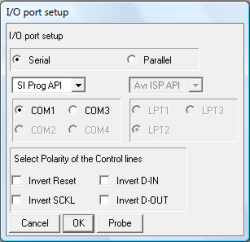
When you want to program your microcontroller with the PonnyProg2000 you have to setup the program as you can see on the following picture. You have to select chosen COM port, where is connected your programmer.
(Ponyprog I/O port setting)
Using Avrdude:
When you want to program your microcontroller with Avrdude you have to select the keyword "ponyser" as a programmer type and appropriate COM port. I'm using this method to program my microcontroller directly from the Atmel AVRstudio when I'm debuging my application. I create a batch file with the command for the avrdude and I call the batch file directly from the tool bar. It is very fast and easy. Avrdude is also part of the WinAVR package.
(Microcontroler programming by avrdude)
Programming header reduction:
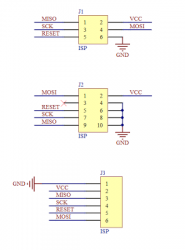
Sometimes you have to program microcontroller in a aplication where is only 6 pins header instead of 10 pins. I created small adapter for this purpose. The adapter has 10 pins header, 6 pins header and 6 pins header in one line. 6 pins header in line is useful when you want to bring the signals to the breadboard.
(Schematic of the programming header reduction)
(Assembly diagram)
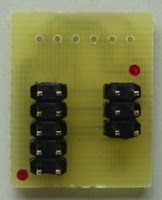
(Assembled PCB (top side))
(PCB (bottom side))
With this equipment you should be able easily program your AVR microcontrollers. Thanks for reading~


")