

hardnrg
-
Posts
14,192 -
Joined
-
Last visited
Recent Profile Visitors
34,217 profile views


hardnrg's Achievements
")
Newbie (1/14)
-
CPU: Intel i7 920 Motherboard: Asus P6T Deluxe v2 RAM: 12GB (6x 2GB) of Corsair XMS3 GPU: 2x NVIDIA GTX260 in SLI HDD (OS): 4x Kingston V Series 64GB SSD RAID-0 Case: Chieftec Bigtower Mesh (hardnrg edition) Cooling: Dtek Fusion CPU block, 2x Laing D5 Vario, Thermochill PA120.3, Swiftech MCR-220, 2x Swiftech MCW60-R + 2x Swiftech GTX200 PSU: PCP&C Silencer 750 Displays: 24" + 2x 22" LCDs Sound: Audigy2 ZS (hotrodded), M-Audio Studiophile AV40 speakers, BK Gemini II sub Country: United Kingdom
-
lol... I do miss life with less responsibilities and more free time
-
it was 212 posts in 24 hours I think... these days I'm a SysAdmin at a datacentre and have a MacAir for work and generally use that for everything, along with my Nexus4... to be honest I haven't turned my "desktop" main rig on for a long time and barely use it because the 13+ industrial fans are too annoying even with them all on speed resistors and/or fan controller... it's like Dambusters my next project computer wise is to shift my main rig from the Chieftec Mesh Bigtower (yeah the one I slaved away modding for a year or more, with bathroom workshop + paint booth, ) into a 5U rack case I already have... and make it as quiet as possible, but keeping the GTX260 SLI even though it's really old now... so gonna have a go at sticking the PA120.3 *INSIDE* the case, and probably do away with the second rad MCR-220, and maybe the second Laing D5 too. project after that (or before that?) is to make a sound-deadening 19" rack for the PC, and also for my rackmount NAS, and for future rack expansion... but be able to have all the kit in my home office, instead of have a 1U enterprise NAS making a noise in the hallway in a LackRack tl;dr : I got a real job, girlfriend and a real house ... each of which require/demand my time p.s. wiped the dust of my gamma1 DAC + M^3 amp + K710 headphone set up (around ~
-
All the white NEC boxes are mini-relays: Do you use the Xonar Audio Center that is installed with the drivers? It's easy to switch between headphone and speaker modes.
-
har dee har har, lol they could face each other if I made a "left-handed" stick I guess... but do they even exist?
-
The dreaded wiring I'd tried to wire everything to the PCB, including all the controls, LEDs, and USB, but gave up after multiple failures and settled on just wiring the off-board LED wires (which had been about the only success of the now-ruined PCBs). The onboard LEDs are surface mount and come off with a very difficult balance of firm yet gentle easing with a soldering iron. Some just kinda disintegrated, but all I cared about was exposing the copper pads beneath. The LEDs have a common negative and individual positives (anode/cathode, always forget which is which), so you can actually see in this picture where I've ripped the copper pad off LED1's negative spot, but it doesn't matter as I just used LED4's negative instead as the common. The wires on that LED were temporarily hooked up to a terminal strip so I could confirm them as working and then I put some hot glue on top to stop them ripping off as they're barely holding on to anything, and even a small movement of the wires can pull the tracks off the board. Anyway, I got a handy-dandy AXISdapter PCB and ribbon connector made by Toodles, a master modder, and solder-assembled it. The ribbon connector fits into the 20-pin connector of the PS3 PCB and basically you end up with a bunch of screw terminals to wire up the stick and buttons! I used some random rubber washers to mount it raised off the plywood panel, so that it cleared the mini-B connector of the internal USB connection. Fast forward through much tedious wire-stripping and soldering and I ended up with this (Ken stick). The Ryu stick seemed a bit neater and the AXISdapter didn't need to be mounted at an angle since mounting it on washers on one side was more than sufficiently secure. I almost wonder if it was even worth the effort to take a photo of the bottom since the camera just picks up the reflection so much, but you can probably imagine, based on what you can see here, the fully-wired stick viewed from the bottom. So here we have it, Ken vs Ryu. * * this is actually a photo from earlier, before I wired up the LEDs, but just imagine there are flat-top red LEDs in there, lol It's taken a long, long time to complete these, both in terms of time since the start of the project, and in actual man hours required to design, develop, build and wire up the sticks. Now that I know what's involved in making them, yes, I could make more, but I don't want to for a very long time lol. So far I've only tested them on PC with emulators, but they are excellent and even better than the arcade machines I learnt to play fighting games on as a kid. This weekend is a FOUR-DAY weekend, so I think I timed the completion just right haha. Will be taking them round a mate's house for some battles on PS3. It will be epic, and best of all, no threat of sore thumbs!
-
Finishing up the cases Ok, so real life happened and also I got stuck with trying to tack tiny wires onto the 20 pin connector of the PS3 pad PCB, they kept falling off, or they'd move and short on a neighbouring wire, or one a slightly different PCB they ripped off the copper tracks that I tacked onto... it was a nightmare and I basically ruined two PCBs in the process... a third experimental one is possibly still usable... I had a lot of problems getting the varnish even, and ended up forgetting about keeping the grain visible and just put more varnish on lol. I guess arcade cabinets aren't typically made of polished wood anyway, so this was acceptable. With the colour varnish done, I laid down some clear floor varnish that we used on our sanded floorboard of our main bedroom, so if it can stand footfall, it should help protect the stick bodies. The thick plywood base panel was drilled and countersunk to be screwed to the frame. Instead of the stock rounded-square extent limiter, I opted for the more fight-ready octagonal guide. These are attached to the bottom of the joystick, and the octagonal ones make for MUCH better circular movements. Since the joystick moves very freely, I went for regular screws to fix it to the base panel. If they wear loose over time (I highly doubt it), I could replace them with bolt/nut/washers and bolt-through attach the joysticks. The intermediate MDF panels lay on top of the plywood base panel. Then, fast forward a bit and what I've done here is printed out some artwork onto A4 glossy photo paper, painstakingly cut out all the holes for the buttons and stick and LED holders to pass through the photo paper with a scalpel. Laid the printed art down and put the clear acrylic sheet on top, and then fit all the buttons, LED holders, joystick ball top and dust cover. The clear top is held down with some dome-cap mirror screws. These are basically counter-sunk wood screws with a slotted head (so you can turn tighten/un-tighten the screw) and then a tapped hole in the centre. The dome caps have a threaded machine screw which goes inside the tapped wood screw. Pretty cool, I've wondered how they were possible in the past, and they seem to have that nice smooth anti-tamper look that also won't scratch hands/wrists/etc. Each of the buttons is labelled so that you can see what it is. Round at the back you've got the mini-USB connectors for charging. On the bottom, I used panel/cup washers which are flush with the screws. These hold down the bottom smoked black polycarbonate sheet which is translucent. It's just about impossible to take a picture of what you can actually see as the camera "sees" the reflection more than the human eye does, but you can get an idea from where I've held something up in the air to block the bright ceiling, lol. Being able to see the inside definitely stems from my PC modding.
-

Starting a review site/blog is harder than it looks
hardnrg replied to El_Capitan's topic in OCC Member's Lounge
Whilst we reviewers at OCC get bombarded with all kinds of spam from companies, blanket emailing all of us to review their crappy USB powered desktop toasters or whatever... sometimes, just sometimes, we get requests from legit companies targeted at a specific reviewer based on an existing number of published articles (e.g. someone who reviews a bunch of graphics cards will sometimes get a graphics card review request from a company). My somewhat bumbling point is, you need reviews to get reviews, so get to making them (even if it's your own not-brand-new gear), and any other content (guides, articles, etc.)... I had a bunch of worklogs, articles and the like before I became a reviewer here, and I think the first thing I reviewed was my own monitor (that I bought myself), lol. It works a lot easier in a team... and even then it's sometimes Mission ******* Impossible, lol If you can get a competent, dedicated team together, go for it... if not, join up with a decent reviewing team (online or print)... otherwise, man, I guess there are some one-man band people like Video Review Guy or whatever, but er, quite evidently I can't think of any... Team or die -
Fixing a slow Acer laptop for a work colleague
hardnrg replied to bilcliff's topic in Miscellaneous Hardware
Just as a rough guide, that RAM upgrade (in terms of performance difference) will range from: worst case: unnoticeable best case: before = painful, after = tolerable It's not going to turn into an amazing new laptop with 1GB of extra RAM and the difference is going to be very subtle like it will just be *less annoyingly slow*, but not what you'd really call faster... make sure everyone involved is aware of this beforehand, this is the most important step of the upgrade. -
Maybe some old Fear Factory? http://www.youtube.com/watch?v=lRci3qWeFCA http://www.youtube.com/watch?v=WNaq2CZFgzk
-
Just to clarify: HR-05 SLI = 70mm fan HR-05 SLI IFX = 80mm fan If you've got enough space and can find the IFX version, I would recommend it over the non-IFX version
-
Can't make servers after reformating
hardnrg replied to stackrainer's topic in Networking and Internet
Just disable all firewalls on your computer (Windows Firewall, and anything else you've installed) to troubleshoot whether a software firewall is blocking the connection or not. -
Updating Samsung Galaxy SL to Gingerbread
hardnrg replied to N.E.A's topic in Miscellaneous Hardware
I'm actually still on 2.3.4 because I left my USB cable at work, but I install firmware via Odin and am rooted... I'd recommend finding the appropriate section at xda forums to see what the verdict is for the new firmware for your phone, and if any issues exist, if there are any workarounds/solutions. -
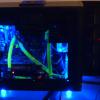
Awesome man, it looks like it runs a lot quieter than my main rig... the "dambusters" drone can be heard in the lounge below, lol I'd recommend the HR-05 IFX (or HR-05 SLI IFX) if you haven't ordered it already, for the 80mm fan mount option (either 25mm or 18mm (?) thick), which gives you more fan options and better cooling / quieter. I used to use them a lot (I think I have 3 or 4 of them!), they're brilliant
-
You can either get an Access Point, or a cheap router (set to Access Point mode and DHCP off)... basically you plug an Ethernet cable from the Linksys router to the new AP/Router(AP mode) and then hey presto you've added WiFi. That's basically it, might need to do a bit of light initial set up of networking on the new AP/Router to define the gateway, DNS, etc. but it's basically a 1 minute job that's really easy.